Build a Trellis – Two Easy Trellis Designs
Steps to Build a Trellis - Wood
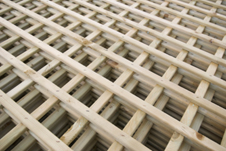
The first build a trellis project is a wood trellis.Pre-made wood trellis panels make it easy to design and build a custom trellis design for your garden or landscape.
Wood trellis panels are available in most garden centers and are easy to cut for a custom design.
Most of the supplies you will already have on hand! Follow these easy steps for a custom trellis design.
What you’ll need:
- Nail Gun or Hammer
- Galvanized Nails
- Wood Putty (to fill in the nail holes)
- Electric Saw
- Washable Marker
- Tape Measure
- Level
- Wood Trellis Panels
- Decorative Moldings (optional)
- Paint or Stain
- Sand Paper
Steps to Build a Custom
Wood Trellis Design
- Develop a plan. Sketch out your design on paper. During the
 planning process ask yourself
the following questions:
planning process ask yourself
the following questions:
- What style is your garden or landscape?
- Do you want a straight, rounded, or curvy top?
- Will your trellis rest against a wall, or be a stand-alone
structure?
- What type of climbing vines or plants will the trellis
support?
- If the trellis design is a stand-alone structure, assemble
the panels using a nail gun or hammer to drive in the nails.
- Attach the decorative moldings around the panels using a
nail gun or hammer.
- Fill in the nail holes with wood putty.
- When putty is dry, sand it down until it is smooth.
- Apply stain or paint. Be sure to allow the stain or paint
to dry completely.
- If your trellis is a free standing structure, your design
is complete.
- For a trellis design that needs wall support, attach 4 X 4 inch wood blocks between the wall and the trellis using the hand gun or hammer.
How to Build a Trellis – Wire
The second project is a simple wire trellis. This type of trellis design is simple to construct and does not need additional support.What you’ll need:
- 3 Wooden or Bamboo Poles, or 3 long twigs or sapplings (at least 6 feet long, 1 inch in diameter)
- Fine Gauge Wire (Paddle Wire)
- Wire Cutters
Steps to Build a Wire Trellis
- Pull the wire from the spool (leave wire attached to the
spool
 for now). Tightly wrap the wire around one end of the poles
(approximately 3-4 inches from the end).
for now). Tightly wrap the wire around one end of the poles
(approximately 3-4 inches from the end).
- Lay the second pole on the ground next to the first wired
pole. Be sure they line up evenly.
- Wrap the wire around both poles by weaving the wire in and
out of the two poles (in a figure eight motion). Wrap each pole at
least four times. They should now be wired together at one end.
- Lay the third pole next to the second. Wrap the wire in
between the second and third pole using the figure eight technique.
Wrap each pole a minimum of four times.
- Twist the wire around the starting end to keep the wire
secure and prevent unraveling.
- Use wire cutters to cut the wire.
- You can now spread out the poles and stand the trellis up
like a tripod.
Subscribe To This Site


